Glitter Nail Varnish Removal Tutorial

[youtube http://www.youtube.com/watch?v=qRz9P8wcpkY?feature=oembed&w=500&h=281]

Glitter Nail Varnish Removal Tutorial

I get a lot of questions on twitter and instagram about tips to easily remove glitter nail varnish, so I thought I’d do a quick video tutorial about it.

All you will need to recreate this video is: Pure acetone, squares of tin foil, a few cotton pads and some killer dance moves. All will become clear…

Let me know if this was helpful, I’d love to hear how you get on. Hopefully you can bring your neglected nail varnishes out of retirement now that it’s not such a chore to remove them!

Lex

Follow:

Halloween Nail Art Tutorial Fangs

Halloween Nail Art Tutorial Fangs

Halloween Nail Art Tutorial Fangs

For today’s Nail Art Sunday I thought I would do a quick Halloween Nail Art Tutorial Fangs for you. This manicure is a little bit fiddly to start with, but once you get the hang of it, it is super easy. For this manicure you will need: a black polish; a red polish; a white polish and a thin brush (or a nail art pen) and some base and top coat.

Before you even get started with colours, you must paint on your base coat –  but you do that anyway, right…?! *hard stare*

You will need 3 polishes (black, red and white), a top coat and a small paint brush.

STEP ONE: Paint your nails black. I recommend Kiko 275 Black as it is the best one I’ve come across.

STEP TWO: Paint the ‘lips’ on at the bottom and top of your nails. You might want to do a layer of white under the lips so it pops against the black.

STEP THREE: Paint on the long fangs on the top and bottom of the lips.

STEP FOUR: Add in the smaller teeth in between and either side of the fangs.

Add top coat and you are done!

Are you going to be trying this nail art? Link me to your pics if you do, I love to see people’s nail art!

Lex

Follow:

Galaxy Nail Art Tutorial

Galaxy nail art tutorial

I made this Galaxy nail art tutorial aaages ago and forgot about it, but here it is finally: a super simple tutorial for a galaxy manicure.

Galaxy Nail Art Tutorial


You will need: A few nail varnishes (you can choose your favourites after playing around a bit but for this particular look I chose black, navy, light blue, pale yellow, green, orange and white), a sponge, and a top coat.

1. Paint your nails with the black nail varnish and, using a small section of sponge (cosmetic sponges are perfect), lightly dab on some dark blue polish

2. Then dab a lighter blue onto the nail in swirls, covering about 75% of the darker blue patches.

3. Add highlights in whatever colour you like: I used green and orange.

4. Add further highlights in the centre of the lighter colours: I used a baby yellow

5. Use a dotting tool to add some stars in white polish. Finish with a generous layer of top coat to smooth it all out.

There you go! Galaxies in 5 easy steps. The best thing about galaxies is trying it out for yourself with any colours you like. Each time I do these, they turn out completely different.

Let me know if you try out this tutorial, I’d love to see your galaxy manicures!

Lex

Galaxy Nail Art Tutorial

Follow:

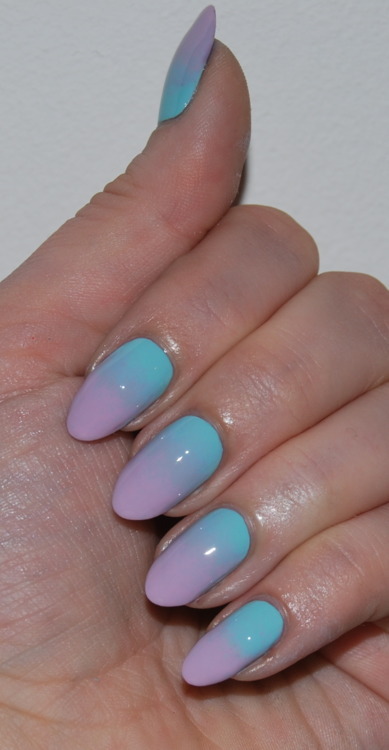
Gradient Nail Art Tutorial

Gradient Nail Art Tutorial

I had such an overwhelming response to my recent gradients blogs posts and I had a lot of questions asking how I do them, so I decided to do a little tutorial for you.

View Post

Follow:

Welcome to Talonted Lex, the go-to online destination for anyone seeking guidance and inspiration on managing rosacea.

From rosacea skincare tips and sensitive skin makeup tutorials to lifestyle adjustments for rosacea relief. Whether you’re looking for the best rosacea treatments, gentle skincare routines, or just a supportive community that understands your skin concerns, Talonted Lex is your ultimate guide.